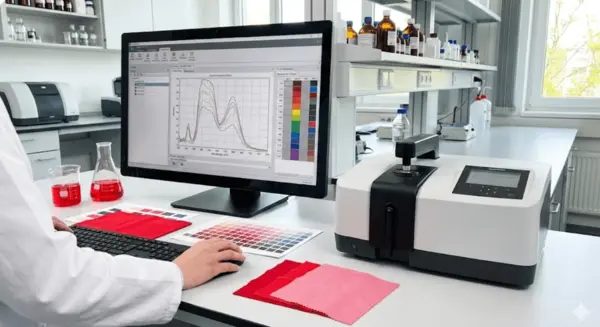
Tear strength is a definitive metric for fabric durability, directly influencing garment longevity and customer return rates. For the QA Manager/Mill Owner, selecting the right tear tester is not just about compliance with ASTM D1424 or ISO 13937, but about ensuring repeatability and data integrity across thousands of cycles.
What You Will Gain From This Guide:
- Method Clarity: Instantly distinguish whether your lab needs an Elmendorf (Pendulum) or Tongue Tear setup based on your fabric portfolio.
- Audit-Proofing: Learn the specific calibration specs required to pass NABL and ISO 17025 audits without friction.
- Smart ROI: A direct comparison of Analog vs. Digital features to reveal where automation actually reduces man-hours and operator error.
Understanding Tear Testing Methodologies (Elmendorf vs. Tongue)
In textile labs, “tear strength” is not a singular metric. It is divided into two distinct physical behaviors: Ballistic Tear (Elmendorf) and Static Tear (Tongue/Trapezoid). Your choice of equipment depends entirely on the end-use of your fabric and the specific test standards your buyers dictate.
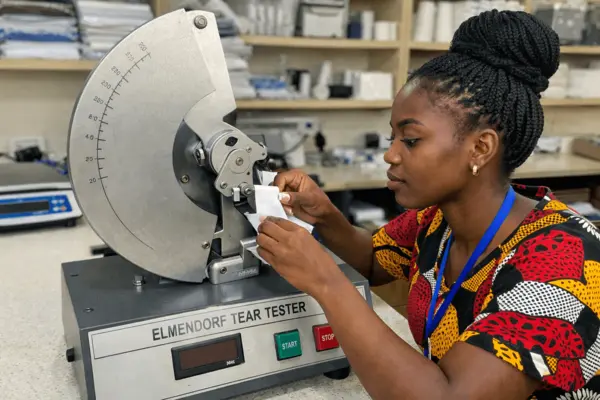
The Elmendorf Method (ASTM D1424, ISO 13937-1) is the global standard for most apparel and home textiles. It utilizes a falling pendulum to apply a sudden, shock force to propagate a pre-cut slit. The instrument measures the energy lost by the pendulum during the tear, converting it into force (Grams-force or Newtons).
Comparison: Which Method Fits Your Lab?
| Feature | Elmendorf (Pendulum) | Tongue / Trapezoid |
| Mechanism | Ballistic / Impact (Energy Loss) | Slow Tension (CRE Principle) |
| Typical Speed | Instantaneous | 100mm/min – 300mm/min |
| Dominant Standards | ASTM D1424, ISO 13937-1 | ASTM D2261, ISO 13937-2/3 |
| Primary Use | Wovens, Denim, Shirting | Coated Fabrics, Tech Textiles, Canvas |
The Equipment Implication
If your lab primarily tests heavy industrial fabrics, geotextiles, or coated tarpaulins, you may not need a standalone tear tester; a Universal Testing Machine (UTM) with the correct jaw fixtures (Tongue/Trapezoid setup) is often sufficient.
However, for 90% of apparel manufacturers—producing denim, shirting, or knits—the Elmendorf Tester is mandatory. A UTM cannot replicate the “shock loading” that fabrics experience during real-world snags (e.g., catching a shirt on a nail), which is why the falling pendulum remains the gold standard for apparel durability.
Critical Specifications for Lab Efficiency
When evaluating an Elmendorf tester, the most critical specification for tear strength checking machine is the Pendulum Capacity Range. A common mistake is purchasing a unit with a limited range (e.g., up to 32N), only to discover it cannot handle heavier heavy-weight denim or canvas later. Ensure your unit supports interchangeable pendulums or augmented weights to cover the full spectrum of your production.
Standard capacity ranges you should look for include:
- Light Range: 0N – 16N (For shirting, lightweight knits).
- Medium Range: 0N – 32N (For trousers, standard wovens).
- Heavy Range: 0N – 64N (For denim, upholstery).
- Extra Heavy: Up to 128N (For industrial textiles).
The Clamping Mechanism: Pneumatic vs. Manual
Do not underestimate the impact of sample clamping. While manual screw-clamps are cheaper, they introduce a significant variable: Operator Strength. If a technician tightens the clamp inconsistently, the fabric will slip during the pendulum swing, invalidating the test result.
Pro Tip: For ISO 13937 compliance, Pneumatic Clamping is highly recommended. It applies a constant, uniform pressure (typically 80-100 psi or 6-8 bar) regardless of who is operating the machine. This eliminates “Jaw Slippage” as a source of error and ensures your Coefficient of Variation (CV%) remains low and we get accurate tear strength results.
Safety Considerations
The Elmendorf test involves a heavy metal weight swinging freely. Modern units must have a Two-Handed Release System (requiring the operator to press two buttons simultaneously to release the pendulum). This prevents the operator’s hand from being in the swing path during activation. Avoid older models with single-lever mechanical releases for lab safety reasons.
Digital vs. Analog: Analyzing the ROI
The primary hesitation for most buyers when upgrading to a digital model for tear strength is the price point; a manual (analog) tester is typically 30-40% cheaper than its digital counterpart. However, for a modern lab, the “savings” on an analog machine are often lost to operational inefficiencies and data errors within the first year.
With an Analog Tester, the operator must visually read a pointer on a graduated scale. This introduces “Parallax Error”—depending on the operator’s height or viewing angle, the reading can drift by 1-2%. Furthermore, the operator must manually record each result and calculate the average of 5 tests (warp) and 5 tests (weft) on a calculator. This manual transcription is the number one source of data entry errors in textile labs.
The Digital Advantage: Where the ROI Exists
A Digital Tear strength Tester replaces the mechanical pointer with an optical encoder. This provides an immediate, precise digital readout, eliminating visual guesswork. The true ROI, however, comes from the onboard software which handles the heavy lifting:
- Auto-Calculation: Instantly computes the Mean, Standard Deviation, and Coefficient of Variation (CV%) without manual input.
- Unit Conversion: Switch between percentages (0-100%), grams-force, Newtons, or pounds with a single button press.
- Pendulum Recognition: Smart sensors detect which pendulum is installed (A, B, C, or D), preventing the common mistake of reading the wrong scale range.
Traceability and Connectivity
In an audit scenario (e.g., ISO 17025), “Traceability” is currency. Digital models often feature RS-232 or USB connectivity, allowing you to export data directly to a PC or LIMS (Laboratory Information Management System).
If your lab processes more than 20 samples of tear strength a day, the time saved on manual calculations—and the elimination of re-testing due to transcription errors—typically pays for the price difference of a digital unit within 12-18 months.
Calibration, Safety, and Compliance Checklists
A tear strength tester is a precise instrument relying on potential energy conversion. Even minor friction in the bearings or an unlevel base can skew results significantly. For ISO 17025 accredited labs, “Calibration” is not just an annual sticker from a third party; it is a daily discipline.
The most critical daily check is the Zero-Point Verification. With the pendulum in its starting position (and no sample clamped), releasing the pendulum should result in a reading of exactly “0”. If it reads greater than zero, it indicates excessive friction in the bearing or pointer mechanism. If it reads less than zero, the instrument is likely not leveled correctly on the workbench.
The “Friction Loss” Test
ASTM D1424 requires a specific check for bearing friction for tear strength tester. This involves swinging the pendulum freely and observing how long it takes to come to a stop.
- Requirement: The pendulum should swing back and forth for a minimum number of cycles (often >35 oscillations for a high-quality bearing) before stopping.
- Action: If the swing count drops, the bearings need cleaning or replacement.
Compliance Checklist for the QA Manager
To ensure your purchase and subsequent operation of tear strength testing pass external audits (Buyer or NABL), verify the following list:
- Check Weights: Does the vendor supply “Check Weights” (calibrated masses) that attach to the pendulum to simulate a specific force (e.g., at 50% of the scale)? This allows internal verification without sending the unit out.
- Blade Sharpness: The cutting blade (which makes the initial slit) must be sharp and centered. A dull blade distorts the tear initiation.
- Jaw Alignment: The clamping jaws must be parallel. Misaligned jaws create “shear” force rather than pure tear force, inflating the result.
- Leveling Bubble: Ensure the unit has an integrated spirit level and adjustable feet; gravity is the driving force, so the unit must be perfectly plumb.
Comparative Spec Table: Entry-Level vs. Advanced
To simplify your decision, this matrix compares a standard Entry-Level Mechanical model against a Professional Digital model. Use this to align the machine capabilities with your lab’s throughput.
| Feature | Entry-Level (Analog) | Pro-Lab (Digital) |
| Capacity | Single Range (e.g., 0-64N) | Multi-Range (0-128N) |
| Clamping | Manual Screw | Pneumatic (100 psi / 7 bar) |
| Result Readout | Visual Scale (0-100%) | Digital Display (N, gf, lbf) |
| Accuracy | ± 1.0% of Scale | ± 0.2% of Scale |
| Calculations | Manual (Calculator required) | Auto (Mean, CV%, SD) |
| Data Export | None (Logbook) | RS-232 / USB to PC |
| Safety | Mechanical Lever | Two-Handed Electronic Release |
Who Should Buy What?
- Choose Entry-Level (Analog) if: You are a small garment buying house or a boutique mill running <5 tests per week. The low cost justifies the manual labor involved.
- Choose Pro-Lab (Digital) if: You are a certified commercial lab or a mill running >20 tests daily. The pneumatic clamping alone saves significant operator fatigue and re-testing costs, while the digital data output is often a mandatory requirement for top-tier buyer audits (e.g., GAP, H&M).
Final takeaway
Investing in a tear strength tester is a commitment to data integrity. Whether you choose a robust mechanical unit for basic checking or a sophisticated digital system for an accredited lab, the goal remains the same: Repeatability. If two technicians test the same fabric and get different results, the machine (or the method) has failed.
Please check our buying guide for Tensile Tester also.
List of Major Textile Tear Strength Tester suppliers for reference
Disclaimer: This list is informational only and does not imply ranking or endorsement. It is presented in Alphabetical order. Always evaluate each supplier against the specifications defined in this guide.